Friday, July 11, 2008

OpenSolaris installation screencasts

Today, I came across a very good collection of screencasts which visually walks one through the backing up, repartitioning and then installation of Open Solaris on ones laptop. The OpenSolaris release is 5.11 and all the installation steps are shown. You need Flash player ver 6 or greater to watch the screencast - not a big issue as Adobe has released Flash player ver 9 for Linux. In a nutshell, these are the steps that are showcased in the screencast.
  1. Backup your laptop to prevent any data loss, should something go wrong. The laptop has Windows XP professional pre-installed. So first the disk is defragmented and scan disk utility is run to make sure there are no errors. To do the actual backup, they use the free G4U - short for Ghost for Unix, which is similar to the Norton Ghost disk cloning software in Windows. This can be downloaded into three floppys or as an ISO and burned onto a CD. Using G4U, they perform a backup of the whole disk to a remote ftp server. G4U can also be used to do a disk to disk backup.
  2. The second step in the procedure is to repartition the disk to make room for OpenSolaris. For this they demonstrate how to shrink the Windows partition using the Free software QtParted. This is a GUI front end for the 'parted' tool and is similar to Partition Magic in that it non-destructively shrinks the partition. This software is available on the System Rescue CD which is a remastered Gentoo Linux distribution. One thing worth noting is that while creating the new partition, they format the new partition as Linux swap.
  3. Install Solaris on the newly created partition. This screencast shows all the steps in the installation of OpenSolaris albeit in a time compressed sequence.
  4. And finally, another screencast shows how to download and install Sun Studio 11 software on OpenSolaris.
All in all, there are 5 screencasts which I found to be truly informative. If you have the time and the bandwidth, watching the screencasts is highly recommended. More over, they may not be around for a long time as the domain doesn't work properly except the link containing the screencasts.

Book Review: SELinux by Example

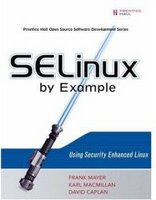
SELinux by ExampleSELinux is a project started and actively being maintained by the U.S Department of Defense to provide a Mandatory Access Controls mechanism in Linux. It had been a long standing grouse of Linux power users and system administrators over its lack of fine grained access control over various running processes as well as files in Linux. While Solaris touts its famous RBAC and Microsoft Windows has its own way of providing finer rights to its resources, Linux had to put up with the simple but crude user rights known in tech speak as discretionary access control to control user access of files. But with SELinux project making great strides and now being bundled with many major Linux distributions, it is possible to effectively lock down a Linux system through judicious use of SELinux policies. SELinux implements a more flexible form of MAC called type enforcement and an optional form of multilevel security.

The book "SELinux by Example" is authored by three people - Frank Mayer, Karl Macmillan and David Caplan and is published by Prentice Hall. The target audience for this book is SELinux policy writers and system administrators with more content dedicated to be put to use by policy writers. There are a total of 14 chapters and 4 appendices spread just over 400 pages. The 14 chapters are in turn broadly divided into three parts with the first part containing chapters which provide an overview of SELinux, its background and the concepts behind it. The second part contain 7 chapters which are most useful for SELinux policy writers and contain detailed explanation of the syntax used in writing the policy files. It is the third part namely "Creating and Writing SELinux Security Policies" which could be most put to use by system administrators where the authors provide enough details of working with SELinux.

In the second chapter, the authors introduce the concept of type enforcement access control, understanding of which is imperative to ones knowledge of SELinux. They further talk on the concept of roles and multi level security. And true to the title of the book, all these concepts are explained by analyzing the security controls of the ubiquitous passwd program.

In the succeeding chapter the authors explain the underlying architecture of SELinux. More specifically, how SELinux integrates with the Linux kernel via the Linux security module (LSM), the organization of the policy source file and how to build and install policies.

SELinux policies to a large extent are based on object classes. For example, you can create an object class and associate a set of permissions to that class. And all objects associated with that class will share the same set of permissions. In the fourth chapter, one get to know about different types of object classes and the permissions that can be assigned to these classes. A total of 40 classes and 48 permissions are discussed in this chapter.

The next chapter titled "Types Enforcement" goes into a detailed analysis of all the types and attributes as well as the rules that could be used. The majority of SELinux policy is a set of statements and rules that collectively define the type enforcement policy. Going through the chapter, I was able to get a fair idea of the syntax used in writing TE policies.

Keeping in mind the complexity of the subject, it helps a great deal that at the end of each chapter, there is a summary section where the authors have listed the important points covered in the chapter. More over, one gets to answer a couple of questions and check one's knowledge about the topic being discussed.

In the 6th chapter, the authors explain in detail the concept of roles and their relationship in SELinux. In fact, what I really like about this book is the fact that each concept of SELinux has been dedicated a chapter of its own. For instance, constraints, multilevel security, type enforcement, conditional policies,... all are explained in chapters of their own.

One thing worth noting is that Fedora Core 4 and RHEL 4 and above ship with the targeted policy by default. Where as to completely lock down a Linux machine, you need to embrace the strict SELinux policy. But this has the side effect of causing breakages with some of the existing Linux applications which expect looser security controls. In targeted policy, the more confining rules are focused on a subset of likely to be attacked network applications. So in most cases, one can manage by using targeted policy. This book mostly deals with the strict policy of SELinux and in chapter 11, the authors dissect the strict example policy maintained and updated via the NSA and Fedora Core mailing lists.

But there is another policy called the Reference Policy which is an attempt to water down the strict policy maintained by NSA and in the process make it easier to use, understand, maintain, also to make it more modular and this is covered in the succeeding chapter titled "Reference Policy".

The chapter titled "Managing an SELinux system" is one which the system administrators will relate to, where the authors throw light on the hierarchy of SELinux configuration files. The purpose of each file is explained in simple terms. And considering that SELinux comes bundled with a rich set of tools meant to be used by system administrators, one gets to know the usage of some of them and also learn about the common problems that are faced by administrators while administering an SELinux system.

And in the last chapter of the book which is the 14th chapter, one is introduced to the task of writing policy modules. Here the authors hand hold in the creation of a policy module for the IRC daemon for Fedora Core 4 from start to finish which involves right from the planning stage to writing and applying the policy module, to the final testing of the module.

This book also includes 4 appendices which contain a wealth of knowledge on SELinux. I especially liked appendix C which lists all the object classes and permissions as well as appendix D which has a list of SELinux system tools and third party utilities with explanations.

It could be just me but I found that I was better able to assimilate what the authors explained when I read the 13th chapter of this book first and then went back to read the 4rd chapter onwards. Having said that, I find this book to be an excellent resource for people interested in developing SELinux policies and to a lesser extent a resource for system administrators. At the very least, this book imparts a deep understanding of the features, structure and working of SELinux.

Book Specifications
Name : SELinux by Example
ISBN No : 0-13-196369-4
Authors : Frank Mayer, Karl Macmillan and David Caplan
Number of Pages : 430
Publisher : Prentice Hall
Price : Check the latest price at Amazon.com
Rating : A very informative resource ideal for SELinux policy writers, Linux/Unix integrators and to a lesser extent to System Administrators.

CNR for all - An easy way of installing software on any Linux distribution with just a few clicks

Linspire is synonymous with the popular CNR ("Click 'N Run") software where you download a package of your choice from the Linspire CNR store and install it just like you do in Windows - that is by double clicking on it. The CNR warehouse has a collection of over 20,000 Linux packages, libraries and products, some of them commercial products like Win4Lin Pro, CodeWeavers' CrossoverOffice and TransGaming's Cedega which are made available to the Linspire / Freespire users. And the users can search for applications by title, popularity, user rating, category, function, or author.

Till now CNR contained software primarily for Linspire or Freespire Linux distribution users. But Kevin Carmony - the President and CEO of Linspire Inc who operates the CNR repository has now made public, his intension of supporting all other Linux distributions via its CNR one click install software.

Just to bring it in perspective, consider this scenario... At present, if you are a Slackware Linux user and you want to install say, GNUCash - a financial software, there is no easy way of installing it other than downloading and compiling the source of GNUCash and all its library dependencies. This is because the Slackware distribution does not support Gnome or GTK2 based software and so the official Slackware repository does not offer a compiled version of GNUCash.

With CNR supporting all Linux distributions, it will be possible to download the GNUCash binary from the CNR website and install and run it on Slackware with just a couple of clicks. It will be easy to upgrade any software to the latest version with ease. Finally, we will have a process of installing software using the CNR installer, just like you do it in Windows, that too for any Linux distribution.

Fig: The CNR warehouse with the software packages divided into categories

Kevin Carmony claims CNR does dozens of things to make finding, installing and managing software on your desktop computer extremely easy. For example, it is very easy to find the right piece of software with user reviews, charts, screenshots, descriptions, friendly names, and so on. Once you've found what you're looking for; with literally one click, the software is installed to your computer and icons added to your desktop and Launch Menu. CNR then notifies you when updates are available, which you can then install with one click. With this anouncement, CNR now has a new website at CNR for all.

Free Book - Linux Kernel in a Nutshell

One of the advantages of using GPLed software is that anybody who wish to use or modify the code can do so without fear of any repercussions. Ditto for the documentation of the software. This has at times tempted many a book author to release their books under a liberal license and make their efforts available for free in an electronic format.

One such author is Greg Kroab-Hartman who has released his book titled "Linux Kernel in a Nutshell" under the Creative Commons Attribution-ShareAlike 2.5 license which allows you to download and redistribute the book.

This book is not new rather, it has been significantly revamped to include details of the 2.6.18 Linux kernel.

This book covers the entire range of kernel tasks, starting with downloading the source and making sure that the kernel is in sync with the versions of the tools you need. In addition to configuration and installation steps, the book offers reference material and discussions of related topics such as control of kernel options at runtime.

The author claims this book is targeted at the lay person who wish to delve deep into understanding the Linux kernel and apart from a basic familiarity of the Linux shell commands, no particular prerequisites are expected from the reader. So it is a how-to sort of book which explains the steps that lead to properly building, customizing , and installing the Linux kernel.

So why should you recompile a Linux kernel ?
There are many advantages to compiling a Linux kernel. For one, you need enable only those modules which are required by your machine. For example, if your machine does not have support for infra red or do not have a need for PCMCIA, then you can disable those features in the kernel configuration and build your custom kernel. This will make the kernel lean and speed up the boot process. Similarly, If you intend to run Linux on a 486 machine (Yes it is entirely possible), you can turn off all the other processor specific support in the kernel configuration file and build a kernel targeted specifically at your processor.

So if you are the curious one who wish to learn how to configure, compile and install your own Linux custom made kernel then this book will be very useful.

Table of contents of "Linux Kernel in a Nutshell"
  • Title page
  • Copyright and credits
  • Preface
  • Part I: Building the Kernel
    • Chapter 1: Introduction
    • Chapter 2: Requirements for Building and Using the Kernel
    • Chapter 3: Retrieving the Kernel Source
    • Chapter 4: Configuring and Building
    • Chapter 5: Installing and Booting from a Kernel
    • Chapter 6: Upgrading a Kernel
  • Part II: Major Customizations
    • Chapter 7: Customizing a Kernel
    • Chapter 8: Kernel Configuration Recipes
  • Part III: Kernel Reference
    • Chapter 9: Kernel Boot Command-Line Parameter Reference
    • Chapter 10: Kernel Build Command-Line Reference
    • Chapter 11: Kernel Configuration Option Reference
  • Part IV: Additional Information
    • Appendix A: Helpful Utilities
    • Appendix B: Bibliography
    • Index
All the chapters have been made available as individual PDF files and can be downloaded from the author's website. This book is published by O'Reilly and if need be, you can also buy a printed version of the book. It is a very nice book which teaches the art of configuring, building and installing your very own custom Linux kernel.

Vim tips : Using tabs

I am an ardent fan of the versatile text editor Vim created and maintained by Bram Moolenaar. A side effect of being enamoured by this editor is that I am tempted to document each and every unique characteristics of Vim when I come to know of it. In all these many years of using Vim, I am astonished by the fact that a simple text editor such as this can show such versatility and flexibility to the extent that it can also be used by developers as a programmer's editor to write their code. I have also heard that Vim editor can be used as a plugin in the Microsoft Visual Studio in place of its default editor. Visual Studio btw, is a very popular Visual IDE albeit for Windows platform, which is the tool of choice to develop software in a wide variety of Windows specific computer languages.

So on the lines of my love affair with Vim, in the past, I have published a concise tutorial on using Vim, talked about how to make Vim more user friendly and have highlighted a couple of new features in Vim 7.0 apart from bringing news about occasions which might have an impact on Vim.

Today, I came across a very interesting article written by Joe 'Zonker' Brockmeier who explains the different commands which help in using tabs in Vim. As many of you are aware, tabs are one of the new features in Vim 7.0 and it is possible to use tabs in both GUI mode of Vim as well as the console mode. And tabs have proven to bring a degree of user friendliness in a variety of software with it being most evident in web browsers.

Install Debian from within Windows

That is right, Debian has got itself a new Win32 installer. This new software is targeted at people who are not too tech savvy to know the steps needed to burn the Debian ISOs on to a CD/DVD. The first time I read the news, I wondered how it was any different from installing Linux on a UMSDOS filesystem ? It is very different it seems...

The setup consists of a Debian installer loader which merely downloads a Debian netboot installer - you can choose between a GUI install and a text based install. And in the next reboot of the computer, Grub loads and prompts you to either boot into Windows or initiate the Debian installation. This is made possible by utilizing the services of Grub4DOS which is a GRand Unified Bootloader which uses the grub console GDLR which can be loaded from within the Windows boot manager.

Once the Debian installer starts, the rest of the steps are the same as those you would carry out in a normal installation of Debian. So you have the option of repartitioning your hard disk from within the installer and dual boot between Debian and Windows or entirely wiping out your Windows OS to make way for Debian.

The Debian installer loader can be downloaded from the goodbye-microsoft.com website. A couple of screenshots of the installer have also been made available here.

AmaroK - A versatile music player for GNU/Linux

I was always of the impression that the function of a music player was little more than playing music. That impression took a beating when I tried a versatile music player called AmaroK. This music player is developed specifically for the KDE environment but can also be used in other window managers. What is unique about this music player is that it supports a wide variety of features apart from playing music.

I am not a keen connoisseur of music. But I do enjoy listening to certain kinds of music. My taste in music is driven by the rhythm of the music rather than its lyrics. So even if there is no meaning to the song but is pleasing to my ears, then I tend to enjoy it more. When ever I come across songs that I truly like, I usually rip them from my audio CD and save them on my computer so that I do not have to pop in the CD each and every time I want to listen to the music. Now if you are wondering what all this have to do with AmaroK, then read on...

The first time you install and run AmaroK, it will scan your home folder and any other location you have specified for music files and compile the data and create a collection. This collection will be stored in a database of your choice. Building your collection is an essential step in using all of AmaroK's features. As of now, Amarok supports MySQL, PostgreSQL and SQLite databases. If you are not database savvy or do not have a database installed on your machine, you can choose SQLite database option. SQLite is a small C library that implements a self-contained, embeddable, zero-configuration SQL database engine. Among other features, SQLite can store a complete database inside a file. AmaroK has bundled the SQLite database engine with it. Since I already have a MySQL database installed on my machine, I chose to use MySQL over SQLite. Once the scanning is out of way, you can start listening to the music from within AmaroK.

AmaroK music playerFig: First time, you will be prompted to build a collection of all your music files.

The AmaroK user interface has a couple of browsers as seen by the tabs on its left hand side. They are Context browser, Collections browser, Playlist browser and Files browser. Lets say, I am listening to a song titled "Hotel California" - a very popular song in an album which saw sale of millions of copies. If I want to know more about the song while playing it, I need just open the Context browser. Here is the interesting part, in the context browser, there are three tabs namely - Music, Lyrics and Artist. In the Music tab, I can view the details such as the name of the song, the number of times I have listened to the song, the last time I played it as well as a thumbnail of the cover of the album which includes this song. If I click on the thumbnail of the album, I am straight away taken to the relevant Amazon webpage where I can buy the album.

AmaroK music playerFig: Details of the song being played including a few other interesting data.

If I want to read the lyrics of the song, I need just click on the lyrics tab and if it is not already there, AmaroK will automatically download the lyrics of the song from the internet (yes you need a net connection) and display it in the lyrics tab. And suppose you detect some mistake in the lyrics, then it is also possible to edit the lyrics in place and save it.

AmaroK music playerFig: Read the lyrics of the song while listening to it.


AmaroK music playerFig: Right click on any song track and directly burn it to CD/DVD.

The Artist tab will show the relevant Wikipedia web page of the artists who composed the song. In the case of the song "Hotel California", it showed me the Eagles band's wikipedia page.

AmaroK music playerFig: Read more about the artists who sang the song.

AmaroK music playerFig: AmaroK will automatically pull the Album Cover of the song from the internet and let you store it.

As I noted earlier, AmaroK will scan all the music on your hard disk and compile a collection which is stored in a database. The Collections browser will show all the songs sorted in alphabetical order, album and artist's name.

It is possible to create a playlist in AmaroK. A playlist is merely a group containing a mix of songs from different albums which you wish to listen at a given time. To create a playlist, just drag the songs from the collections browser that you wish to include in the playlist to the right hand pane and AmaroK will create a playlist of the songs and you can give it a custom name. The newly created playlist can be viewed in the playlist browser on the left hand side. Initially, you will find a number of pre-created folders in the playlist browser which also includes a collection of internet radio stations. By just double clicking on one of the stations in the playlist, I was able to listen to a music stream from a radio station via internet. You can also categorize your playlists by rearranging them into your own custom playlist folders.

AmaroK also has the option of sending the name of every song you play, to the popular last.fm site. last.fm is a service that records what you listen to, and then presents you with an array of interesting things based upon your tastes such as the artists you might like, users with similar taste, personalized radio streams, charts, and much more. This popular form of mining data related to music is known as scrobbling. Of course, for this to work, you first need to create an account with last.fm site.

Considering the sheer number of unique features available in AmaroK, it is no doubt, one of the best music players around. What I truly like about this music player is that apart from playing music, it provides tools which allow you to learn more about your favorite song - right from the artist's name to the name of the album, lyrics of the song, details of the band and even the popularity ranking of the song depending on how many times you have played it.